
Anyone who has ever heard of hacking has probably also heard of Kali Linux. This Linux distro is one of the highly secured operating systems that offers impressive features. It lets you access the internet, leaving no footprint. Whether white hat or black hat hacking, you can do anything on Kali Linux.
However, we don’t recommend you perform black hat hacking as it might get you in legal trouble. So, if you are interested in white hat hacking and want to use the popular Linux distribution, this guide is just for you. Here, we will give you detailed information on how to install Kali Linux.
Let’s start with the essential introduction to Kali Linux.
What is Kali Linux?
From a security point of view, Kali Linux is undoubtedly one of the best and most famous Linux distributions. It is a secure Debian-based Linux distribution with hundreds of well-known security tools such as Wireshark, Aircrack ng, and Nmap that come preloaded.
Kali Linux provides advanced penetration testing and ethical hacking capabilities, among many other security-related tasks. The distribution has evolved from an initial release to a rolling release Linux distribution.
The latest version of Kali Linux is 202.2 (at the time of writing this how-to-install Kali Linux guide). Developers made significant changes and turned it into the best version to date. The new version of Kali Linux includes a minimal installation option. Hence, you can pre-select the tools you want to use in the Linux distribution.
Features of Kali Linux
- It is an open-source and completely free-to-use Linux distribution.
- This Linux OS has multilingual support.
- It supports Braille hardware and voice feedback.
- The FHS (Filesystem Hierarchy Standard) makes it easy to find supported files, libraries, and so on.
- It supports ARMHF and ARMEL in various ARM devices, such as the BeagleBone Black and Raspberry Pi.
- It supports multiple wireless devices, USB, and interfaces.
- In Kali, all repositories and packages are GPG-signed.
Basic System Requirements
Kali Linux installation requirements depend on what you want to install and how your current setup is configured.
| Hardware | Minimum Requirements | Maximum Requirements | Resource-intensive Requirements |
| Disk Space | 2 GB | 20 GB | 30+ GB |
| RAM | 128 MB | 2 GB | 8 GB |
Note: For minimum requirements, 512 MB is recommended for the best performance.
- Minimum Requirements: Best for those who want to use Kali Linux without installing a desktop on a Secure Shell.
- Maximum Requirements: Best for those who want to install Kali-Linux-default and metapackage on the default Xfce4 desktop.
- Resource-intensive Requirements: Best for those who want to use resource-intensive applications like Burp Suite.
Kali Linux Installation Requirements
The following are the requirements for installing Kali Linux on your device:
- USB Support/CD-DVD Drive.
- At least 20 GB of space is required on your hard drive.
- Minimum 4GB of RAM (when using VirtualBox or VMware).
- A network with outbound internet access (with DNS and DHCP enabled).
- Kali Linux ISO file.
How to Install Kali Linux?
For our guide on installing Kali, let’s use the Windows operating system for booting the USB drive with the Linux distro.
1. First, visit the Kali Linux official website and download the ISO file.
2. On the download page, you can select the ISO file as per your requirements.

3. Furthermore, download Rufus (Bootable USB creator) and install it on your system.

4. Now open Rufus and click on the SELECT button to choose the Kali Linux ISO file. In the Device section, you will see the name of your USB drive. In case the system doesn’t detect the USB drive, please check the connections correctly. Otherwise, you will get the error while booting the drive.

5. Once you get the Ready Status, click on the START button to boot. Now, shut down your system and reconnect the USB drive.
6. Start your PC/laptop again, and the system will start to boot the OS from the USB drive. If you see the “Invalid Signature” pop-up message, please open the BIOS mode and disable the secure boot.
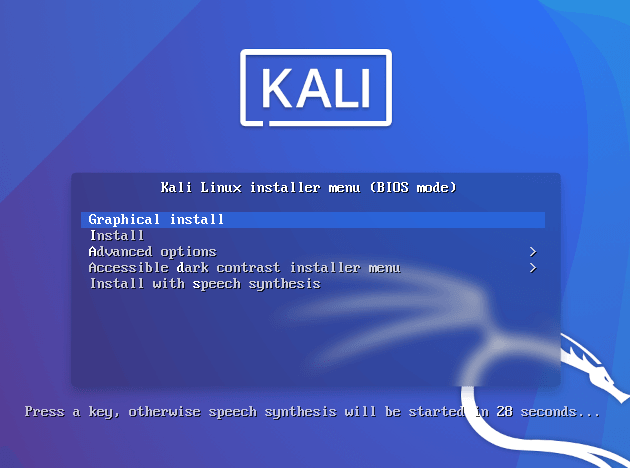
7. After the successful boot, you must select the installation type, so let’s use the Graphical Install option.
8. Choose the language you wish to be the default language for the installed system.

9. Select your location to set up the timezone for the system.

10. Select the language and configure the keyboard to start the installation.

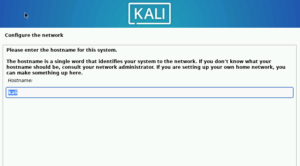
11. On the next page, the system will ask you to configure the network, so if you want to do it, enter the details. Otherwise, skip it.
12. Now you can set up the username and password for the system. Therefore, provide the installation carefully.

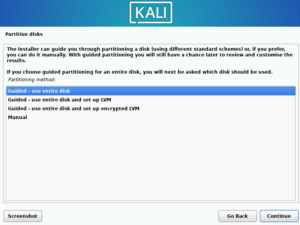
13. For selecting the disk partition, the system will give you different options to select the one according to the requirements.
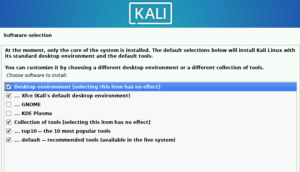
14. After the disk partitioning, select the desktop environment you want to use in Kali.
15. As it is a new installation, the system will prompt you to GRUB Boot loader installation, so select Yes if you want to use it.

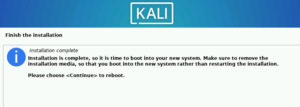
16. After successful installation, you can restart the PC/laptop to apply the changes. Moreover, remove the USB drive when you get the following screen. Otherwise, the system will again start to boot the USB drive at the time of the restart.
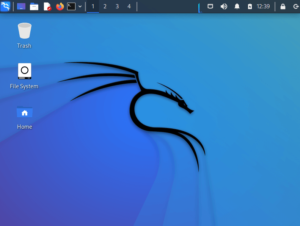
17. Finally, you can now access Kali Linux without having any issues.
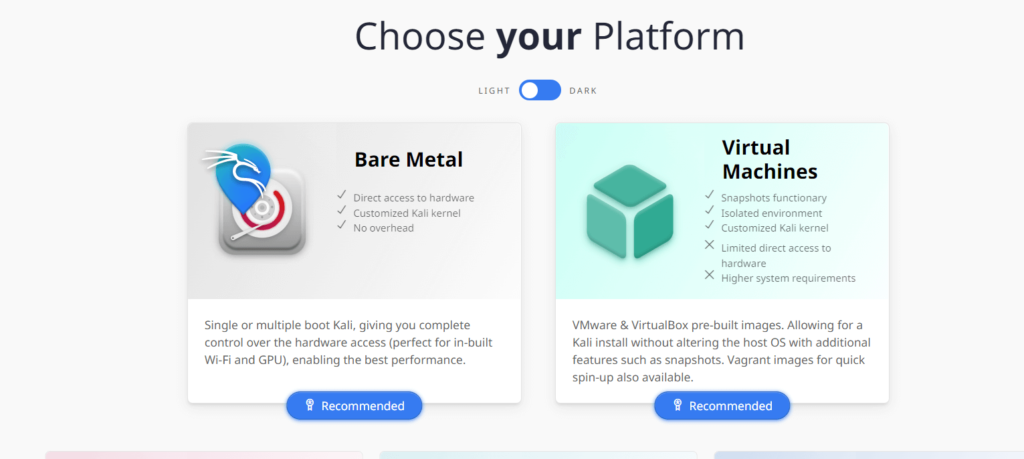
How to Install Kali Linux in VirtualBox?
In case you want to use Kali Linux in VirtualBox, you can download the virtual box package from the official website of the Linux distro.

1) Let’s use the 64-bit VirtualBox Kali Linux.ova file and install it in the system, but you will also need VirtualBox. Hence, make sure to download VirtualBox and install it before using the .ova file.
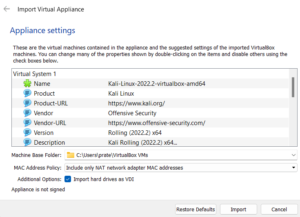
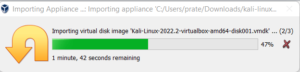
2) After downloading the .ova file, double-click on it, and the system will automatically open the Import mode of VirtualBox. In the import mode, scroll through the list and change the RAM and storage accordingly.
3) Click on the Import option and then the Agree button to start the import process of the files.
4) After the successful import, you can see the Kali Linux option in the VirtualBox list, so double-click to open it.

5) The system will open a new window with the Kali running in it.

Conclusion [Get a Highly Secure Environment with Kali Linux]
Kali Linux is one of the best operating systems for performing ethical hacking. Many developers prefer Kali over other operating systems for learning to hack (usually white-hat hacking only).
That’s why we have written this guide to provide complete information about the methods to install and use Kali. There are multiple ways to install Kali Linux, including using the terminal and Linux commands.
We have included two popular methods so that you can choose one of them according to your requirements and convenience.

Hi! I am Shekhar, a professional web & mobile app developer with expertise in MEAN Stack, Next.js, React.js, and React Native. Being interested in working with different IT technologies, I always look forward to learning something new and challenging. Along with JavaScript, I also know several other programming languages, including Python and TypeScript.